7. May 2026
Meet Etta Lou.
How One Little Jar of Flour and Water Became the Heart of My Kitchen
There’s a jar sitting on my counter most days that looks pretty unremarkable to anyone else.
A little flour. A little water. Sometimes bubbly and active, sometimes sleepy and stubborn.
Her name is Etta Lou.
And around here, she’s family.
If you’ve ever wanted to start making sourdough bread but felt overwhelmed by all the rules, percentages, and bread-science rabbit holes on the internet, I want you to know something first:
You do not need to be a professional baker to make sourdough.
You just need patience, consistency, and a willingness to learn a little rhythm.
That’s it.
So let me introduce you to Etta Lou — and show you how to start your very own sourdough starter from scratch.
First Things First
What Is a Sourdough Starter?
A sourdough starter is simply:
flour, water and time.
That’s the magic.
As the flour and water ferment together, natural yeast begins to grow. Over time, that mixture becomes alive enough to raise bread naturally without commercial yeast.
Which honestly still feels a little like kitchen witchcraft in the best way.
What You’ll Need
Supplies
- A glass jar or container
- A spoon or spatula
- A kitchen scale (helpful, but not mandatory)
- Flour
- Water
Best Flour for Starting
I recommend beginning with:
- unbleached all-purpose flour
- or a mix of all-purpose and whole wheat
Whole wheat helps jumpstart activity because it contains more natural yeast and nutrients.
Day 1 — Meet Your Starter
In your jar, mix:
- 50g flour
- 50g room temperature water
Stir until no dry flour remains.
If you don’t have a scale yet, here’s the easiest beginner-friendly equivalent:
- 50g flour = about ⅓ cup + 1 teaspoon flour
- 50g water = about 3 tablespoons + 1 teaspoon water
For simplicity though?
You can absolutely do:
- ¼ cup flour
- ¼ cup water
That’s it.
Cover loosely with:
a lid set gently on top, a coffee filter, paper towel or cloth
Do not seal it airtight.
Set the jar somewhere warm-ish:
- around 70–75°F is ideal
- not directly in sunlight
Now walk away.
Seriously.
Don’t stare at it every 11 minutes like it’s going to suddenly perform miracles.
It won’t.
Not yet anyway.
Day 2 — Tiny Signs of Life
You may see:
- a few bubbles
- a slight sour smell
- maybe nothing at all
That’s normal.
Discard about half the starter, then feed it:
- 50g flour
- 50g water
Stir well.
Repeat every 24 hours.
Days 3–5 — The Weird Phase (Don't worry)
This is where people panic.
Your starter may:
- smell funky
- rise fast then suddenly stop
- look inactive
- separate liquid on top
- seem “dead”
It probably isn’t dead.
It’s just going through the awkward teenage years. They do like to be dramatic.
Keep feeding it daily.
Trust the process.
Sourdough teaches patience whether we like it or not.
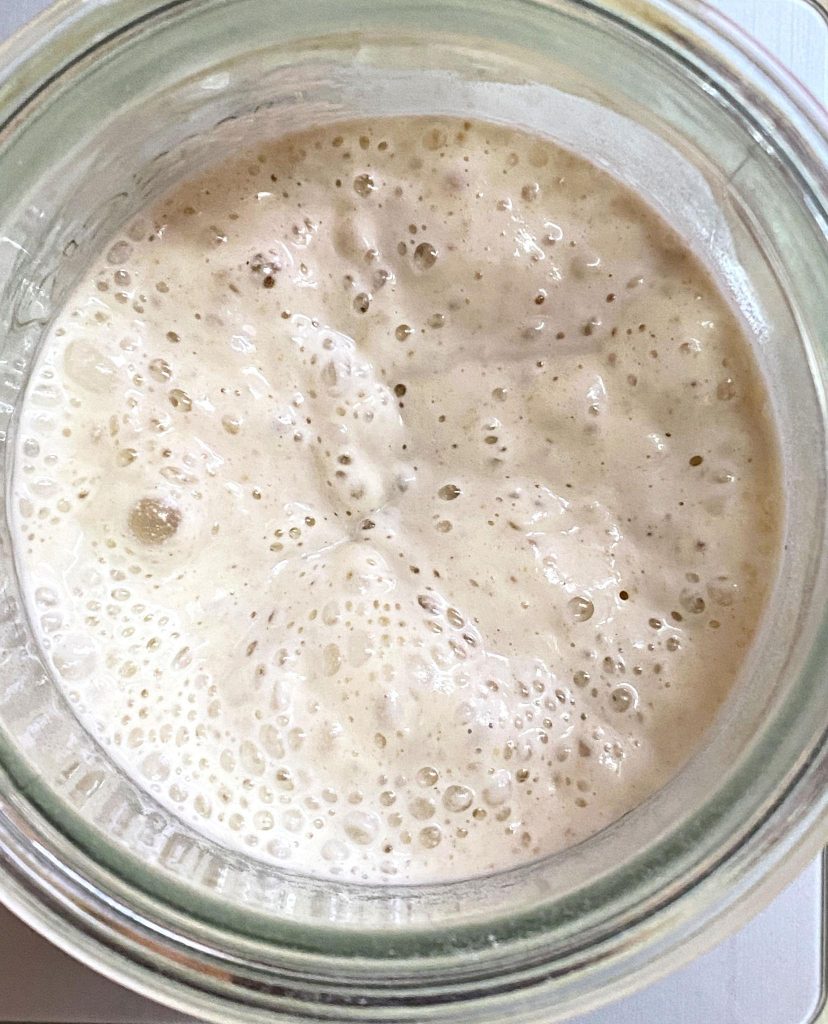
Days 5–7 — The Good Stuff Starts Happening
Around this point, you’ll usually notice:
- stronger bubbles
- consistent rise
- a tangy, yeasty smell
- the starter doubling in size after feeding
Now you’re getting somewhere.
A healthy starter should:
- rise predictably
- double within about 4–8 hours after feeding, depending on temperature
- smell pleasantly sour, not rotten
That’s when you know it’s ready to bake with.
A Few Beginner Tips I Wish Someone Had Told Me
Don’t Obsess Over Perfection
Your starter does not care about your Pinterest expectations.
Some days it’ll be beautiful.
Some days it’ll look like a swamp creature.
Both are normal.
Temperature Matters More Than People Think
Cold kitchens slow everything down.
If your house runs cool:
- place the jar near a lamp
- inside the microwave with the light on
- or in the oven with ONLY the light on
Warmth helps yeast wake up.
Name Your Starter
I’m serious.
Once you name it, you’ll take care of it differently, it becomes family.
Suddenly you’re not “feeding starter.”
You’re feeding:
- Etta Lou
- Bread Pitt
- Doughlene
- Clint Yeastwood
And somehow that makes the process more fun.
What Happens Next?
Once your starter is active, you can make:
- rustic artisan loaves
- sandwich bread
- bagels
- focaccia
- cinnamon rolls
- pizza dough
- English muffins
- crackers
- discard recipes
- and breads that honestly make your whole house feel softer somehow
Sourdough becomes less of a recipe and more of a rhythm.
A little slower.
A little more intentional.
And in a world that moves too fast most days, there’s something beautiful about that.
From My Kitchen to Yours
Etta Lou started as flour and water in a jar.
Now she’s part of birthdays, Sunday dinners, experiments gone wrong, beautiful loaves, and quiet mornings with coffee while dough rises on the counter.
Funny how the smallest things can root themselves into your life like that.
If you’re thinking about starting your own sourdough journey, this is your sign.
Begin messy.
Begin imperfectly.
Begin anyway.
And maybe give your starter a good name while you’re at it.
With love and great bakes,
Rhonda
So incredibly well thought out clear step by step instructions. You have taken the guesswork out of sourdough. Thank you!